
DIY Scrub Cap With Ponytail Holder
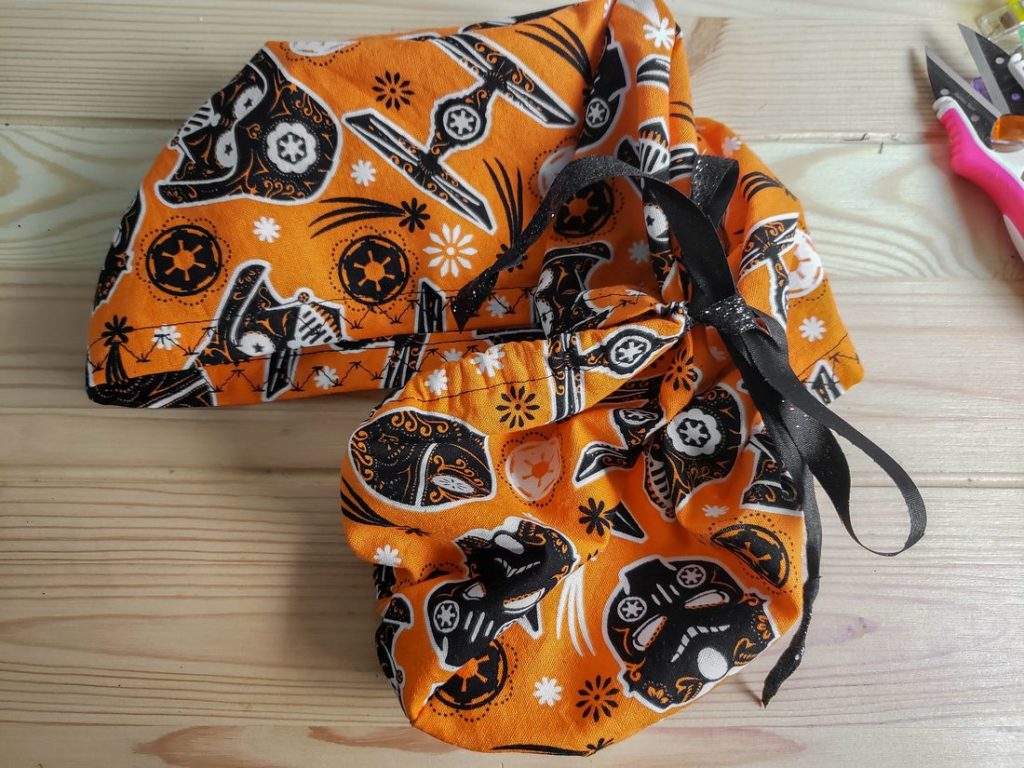
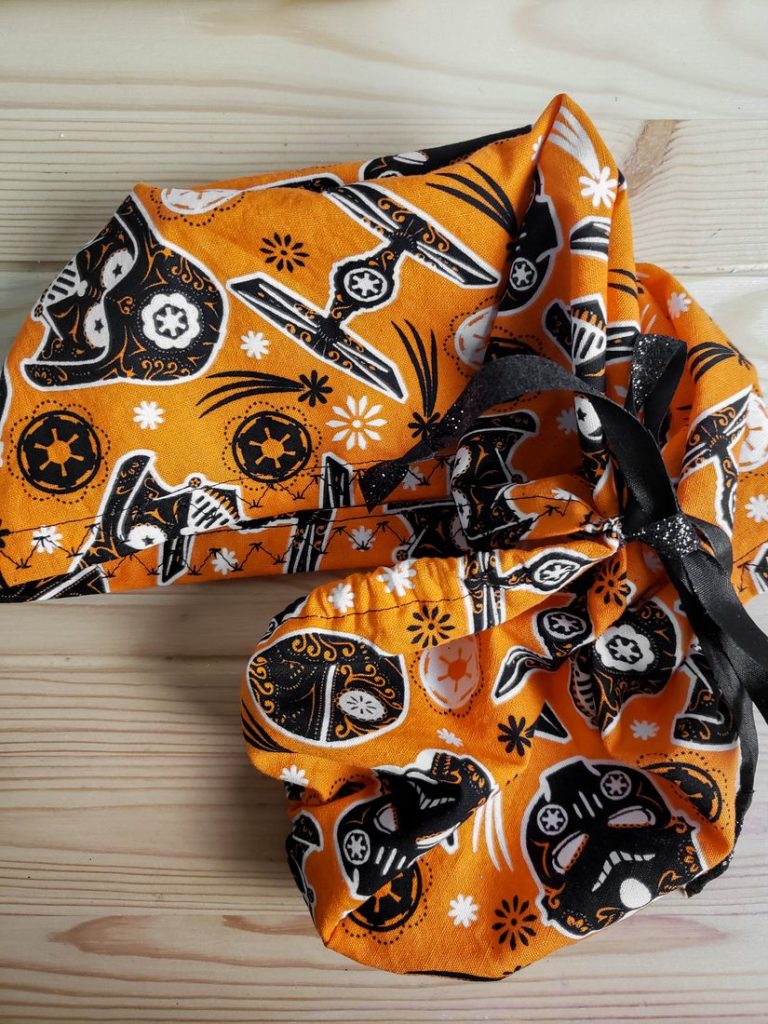
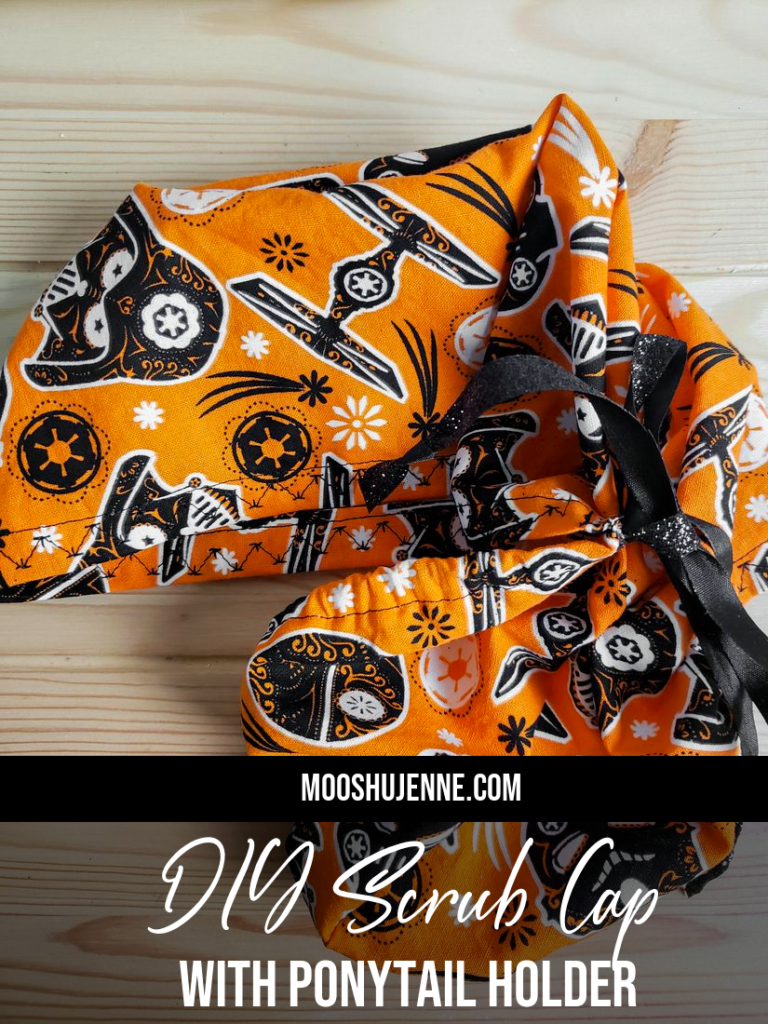
This is a tutorial for how to make a DIY Scrub Cap with ponytail holder for nurses that need them. It’s a super simple pattern that takes a little less than half a yard of fabric. Below I used some Halloween Star Wars fabric and 100% polyester ribbon for the ties.
However, I’ve ordered some twill tape to use for the ties in the future. Twill tape is basically the ties you find on pajama pants or fleece boxers. It’s a material that is pretty sturdy and just needs the ends sewn to withhold.
Download The DIY Scrub Cap Pattern
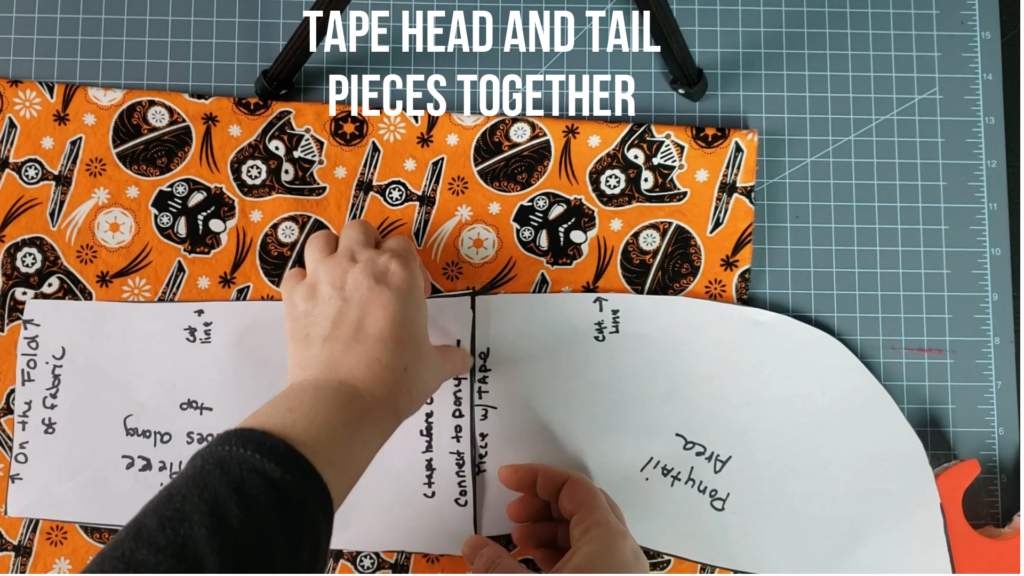
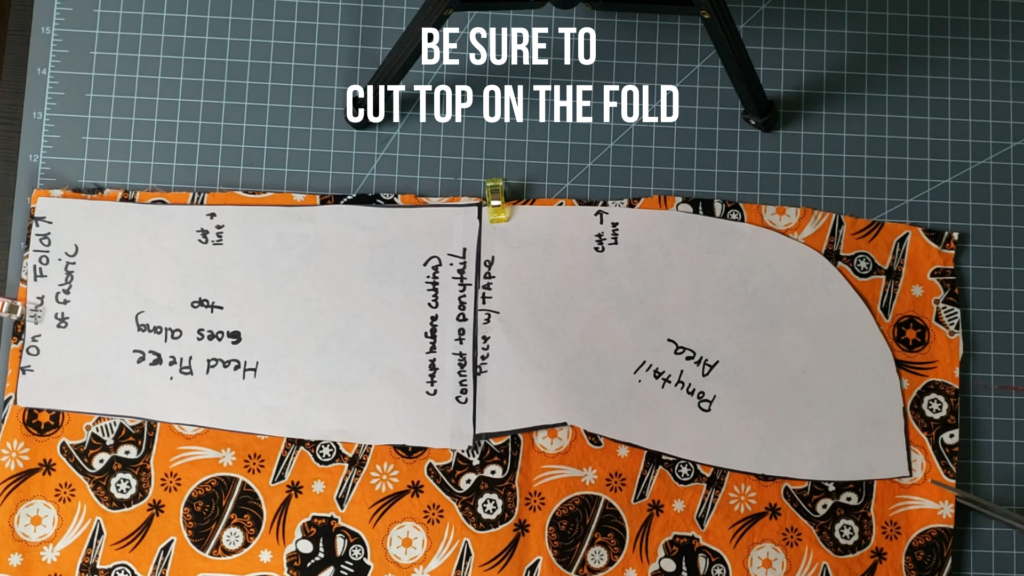
First start by downloading and printing the pattern. Download the pattern here. Then click and print at 100%; must be at 100% to print correctly. Once the pattern is printed then cut out the top, head, and tail of the pattern. Place the head and tail together and tape as shown in the video below.
How To Cut On The Fabric
Cut out the top on one piece of fabric not layered. The head and tail will be cut on the fold at the top of the pattern where it states on the fold. Be sure to tape the head and ponytail pieces where marked.
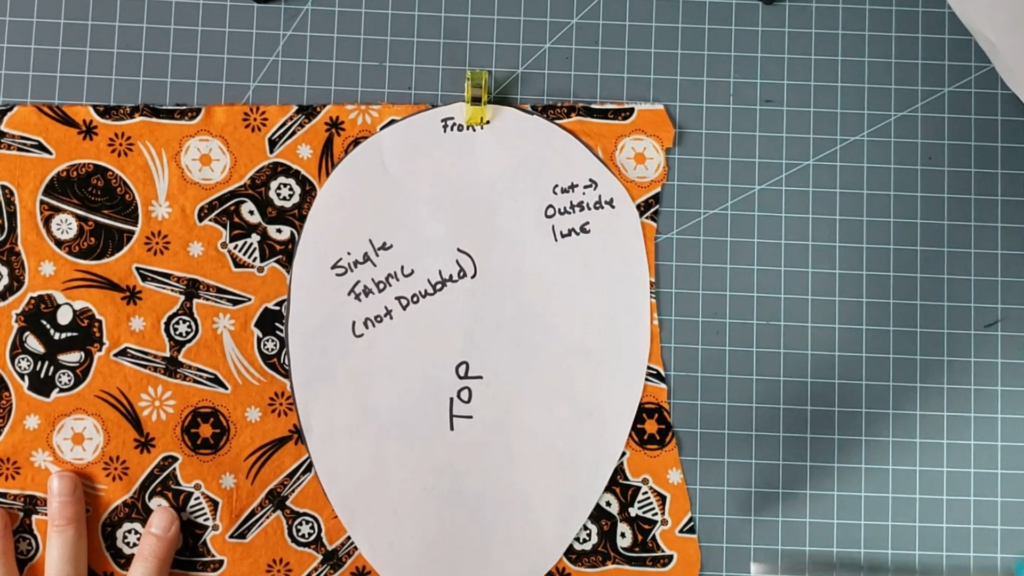
When cutting on the fold for the head and tail pieces be sure that the fabric is doubled where it’s long enough for the entire piece to fit. I place the top of the two pieces where it says on the fold at the top on the fold.
After cutting the single layer top piece and the long piece for the head and tail. Pin or clip them together. I like to use clips because I don’t have to worry about being poked. Start by pinning at the top of the top piece to the center of the head/tail piece opened up.

The best way to show you how to do this is by watching the video below. Once the top piece is pinned to the head/tail piece it’s time to sew. If the tail piece doesn’t line up perfectly then group a little fabric right where the top meets the tail. It won’t be noticed when sewing is complete.
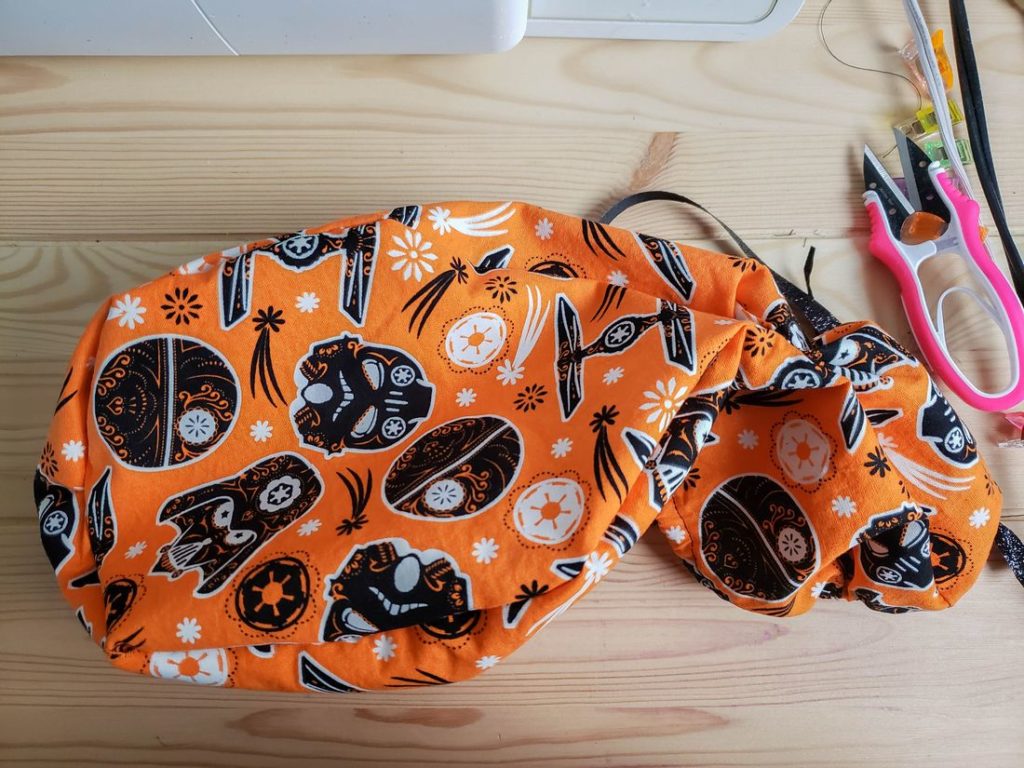
Start at the tip of the top section and sew down the right side with fabric print side down. Then sew from the tip of the top down the left side all the way to the end of the tail. Flip the hat right side up and check for any holes. If you have a hole just go back and stitch it closed.
Making The Hem
Flip the hat on it’s back with the inside facing you. Make a french or rolled hem and clip all the way around. Some pieces may have to have a creased fabric. This is okay just as long as the safety pin can get through later. See the video below for details on how to sew this.
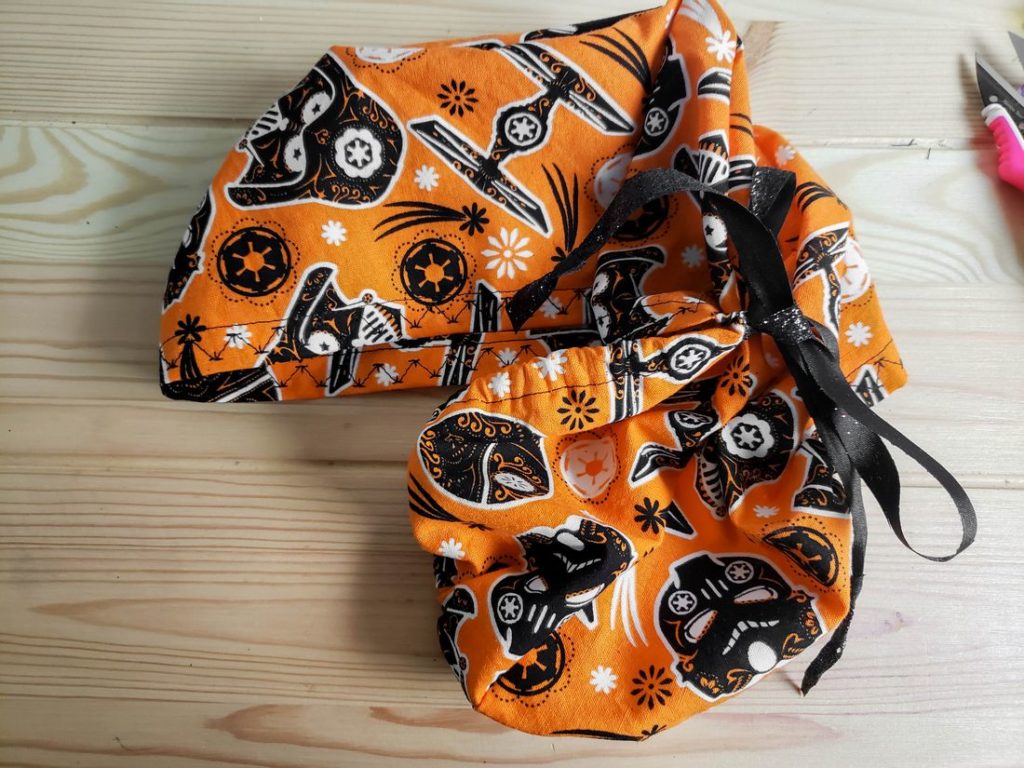
Feeding The Ribbon Or Twill Through
Sew along the inside of the hem allowing for space to run the safety pin and ribbon through. Align the hat together and right where the ponytail piece starts stitch across the hem on each side. Then make a hole below it for the ribbon or twill tape. Use 100% polyester ribbon not satin as satin frays.
Through the holes run the ribbon or twill tape through the hem all the way through till the ribbon or tape is even. This is show in detail in the video below. Hope you enjoy making these for nurses in need around you. If you have questions please place them in the comments!
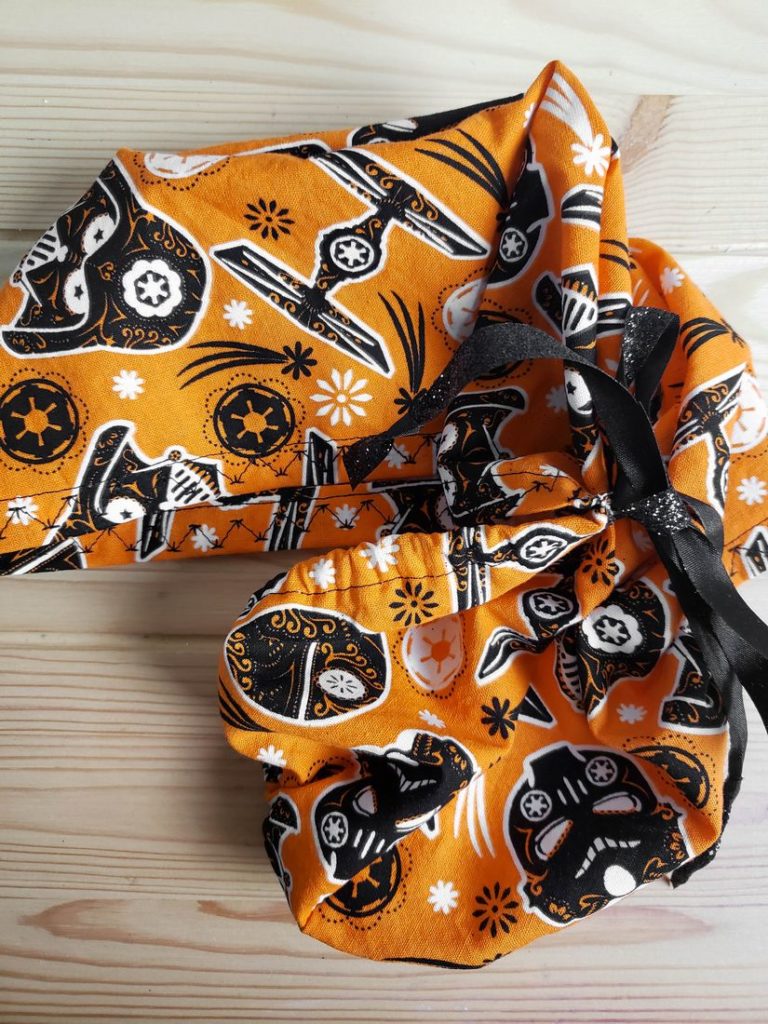
Custom Stitch
I added a custom stitch to the top hem around the head. This is extra and just adds a little fun fashion to the scrub cap.
Pin Me:
I don’t see where the link is for the pattern
It’s right under the title download the diy scrub pattern. It’s listed in the paragraph. https://www.mooshujenne.com/wp-content/uploads/2020/04/ScrubCapTop-merged.pdf
I understand that I need to wash cotton quilting fabric before I cut and sew cap. Should it be washed in cold water and airdried to prevent shrinkage? Or wash in warm / hot water to shrink? Directions usually say prewash fabric but I would like more precise directions. Thank you.
I wash and dry the fabric so that shrinkage can happen before I sew with it.
Hi. Thank you for sharing your pattern and directions. I’m a little confused and hope you can help me. When you tape the 2 pieces together, there is an overlay-should that be there? Also how do you attach the cap to the pony tail pocket so it looks like a clean stitch? Thank you!
Can you tell me which two pieces your talking about that are taped together, please be detailed? You attach the cap to the tail as shown in the video above. There may be some gathering. If your asking if you can roll this to make a no fray stitch then that would be a no as it would add bulk to the hat. “If the tail piece doesn’t line up perfectly then group a little fabric right where the top meets the tail. It won’t be noticed when sewing is complete.” I hope this helps if not please be more detailed with what your having an issue with. Pictures are helpful. Feel free to direct message on instagram with pictures and we can help.
How long is the ribbon?
The ribbon is 40 inches long. It’s shown in the video being measure and trim lengthwise in half. I hope this helps!
Dumb question sorry…does the top part get stitched onto the straight side or the curved side of the head/tail part?
The end curve out so make sure the ends you have that the fat side is to the outward. When you go to pin it you will see that one way won’t work and the other will fit better. You want the tail to make a U shape when pinned.
Thank you for the pattern and the tutorial. I’ve been making lots of scrub hats for nurses (my daughter is a nurse) but not one with the ponytail holder. This pattern was simple and easy to follow. One thing I did differently was to cut a hole on both sides of the seam across the hem, My daughter likes her hat to be super tight and by putting a twill tape in the top, she can tighten it as much as she wants. I used elastic in the ponytail section since it will expand enough to let her put up her ponytail, but she will only have one tie to contend with. I’m going to cut the hole and put the elastic in the ponytail holder and then sew across the seam to hold the elastic. Then I’ll only have one hole. Another thing I might try is adding a grommet to where I cut the hole or cut the hole before I hem and zig zag stitch around it or make a button hole. I’ve been using cotton fabric and it frays. Of course, all this makes it more complicated and one thing I love about your pattern is that it is soooo easy!
Hi,
Are you able to put the scrub cap on so we can see visually how it looks and fits? Thanks for doing this…this is awesome.
I don’t currently have a picture of it on since all the ones I made I donated to the hospital my sister works at as a ER nurse. I’ve also given some to friends that are nurses.
Thanks for replying Jenne. Very kind of you to donate. My daughter is a dental hygienist and I want to attempt to make one for her so this tutorial is very helpful.
Thanks again 🙂
Hello there,
Where is the tutorial in which you explain step by step of what you are doing? The video above has a classical music background no explanation or nothing specially when it comes to making the slit for the ribbon.
Thx in advance
Leslie Whelan, ICU RN
The blog post itself has step by step directions on how to make every step including the pattern. The video is for the visual part. If you use the two together you will understand how to make it. The video shows you how to make the slit. Simple sew to the level to the pony tail across the hem on each side. Then cut a hole under the hem. You then thread the ribbon or whatever you want to use to tie it through with a safety pin. I’d suggest reading the entire blog post and then watch the video. If you still have questions I would be happy to answer them.
Hi. I see you mention a video throughout this tutorial, but I’m not finding a video. Do you have a link to it?
Please let the page fully load. It’s right under Custom Stitch.
No video link shows up, even after the page has fully loaded. It is not present under “Custom Stitch”. Please re-link it.
You may need to refresh the page because the video pops up as the third picture and also when you scroll comes up in the side bar lower area. You can view it here on youtube as well. https://www.youtube.com/watch?v=qHs8_Ru1LNg&lc=UgwGK9J5D9rz32ooach4AaABAg